Dog ears after swimming stay wet deep in the canal for hours, and that trapped moisture is what lets yeast and bacteria grow. To prevent infection, let your dog shake, then dry the flap and visible canal with a towel or cotton ball after every swim. For frequent swimmers, add a vet-approved drying solution. Never push anything deep into the ear.
Dog ears after swimming can hide a problem. The outside looks dry within minutes, but deep in the canal, water sits trapped for hours.
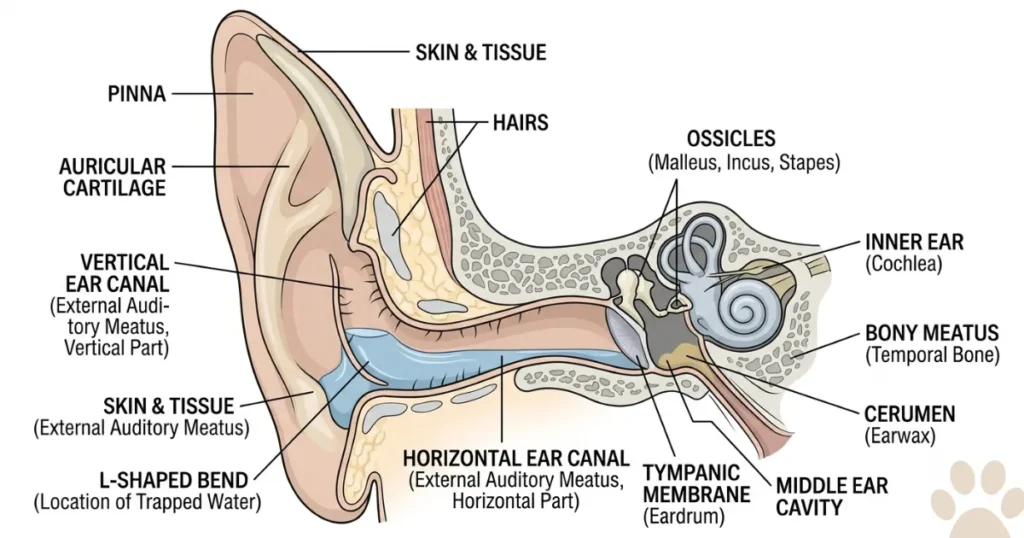
That trapped water is the whole issue. A dog’s ear canal bends like the letter L, so water that gets in cannot simply run back out. It pools at the bend, warm and still, and that is exactly the environment yeast and bacteria need to multiply. Vets even have a name for the result: swimmer’s ear, a form of outer ear infection.
For a Golden Retriever, this matters more than for most breeds. This is a dog built to retrieve from water, with a heavy flap that seals the canal like a lid. Where some dogs swim occasionally, a Golden may be in and out of a lake all afternoon, so the ears rarely get a chance to fully dry between dips.
Veterinary hospitals name Goldens specifically among the breeds most at risk, alongside other floppy-eared, water-loving dogs. That is not a reason to keep your dog out of the water. It is a reason to build a drying habit that lets him swim safely.
This guide gives you the drying routine, the timing, the tools that help, and the mistakes to avoid so your dog can swim all summer without the ear infections that usually follow. For why this breed’s ears are so vulnerable in the first place, start with why Goldens struggle with their ears.
Why wet ears after swimming get infected
Understanding the mechanism makes the routine make sense. Three things line up against a swimming dog.
Water gets trapped at the bend
A dog’s ear canal is not straight. It drops down, then turns and runs sideways toward the eardrum. Water flows in easily and then sits at that horizontal turn, where gravity cannot pull it out.
A board-certified veterinary dermatologist puts it plainly. The L-shaped canal makes it harder for water to escape once it gets inside, and that trapped moisture creates an ideal environment for bacteria and yeast to grow.
The flap seals the moisture in
A Golden’s ear flap hangs flat over the opening. It holds warmth in and keeps air out, so the canal stays humid long after the swim ends.
Add the hair that grows inside this breed’s canal, and airflow drops further. Warm, wet, and still is the recipe for trouble.
The result is swimmer’s ear
Put those together, and you get swimmer’s ear, a type of otitis externa. It is why dogs that swim or bathe often sit at higher risk, though any dog can develop it from routine water exposure. You can build ear care into a wider routine using the rest of our breed health library and more from our Golden Retriever Insights.
How to dry dog ears after swimming, step by step
This is the routine that prevents most problems. It takes under a minute, and it works.
Step 1: Let your dog shake
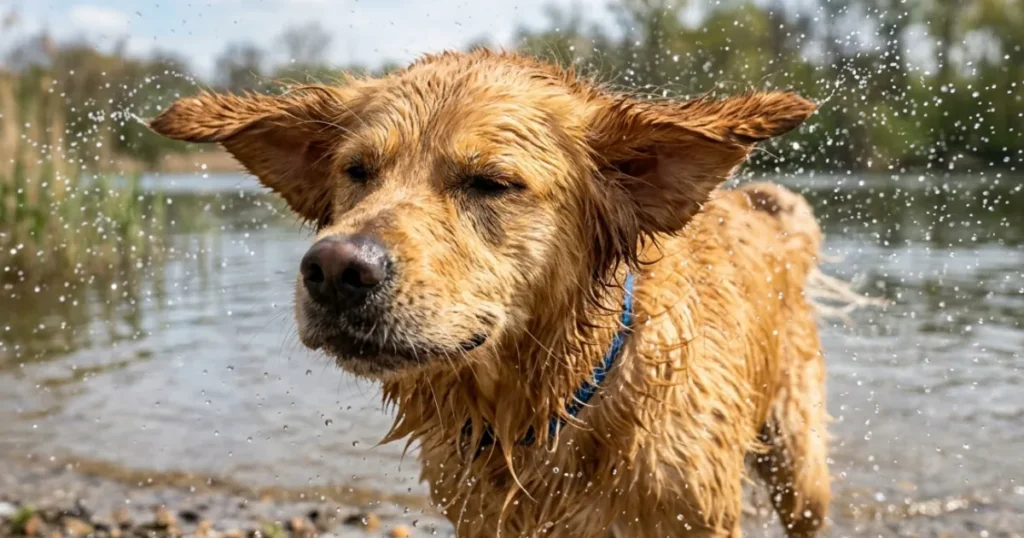
The first tool is your dog’s own instinct. A vigorous head shake clears water from the upper canal and flings it out.
Let him shake fully before you do anything else. It does a surprising amount of the work.
Step 2: Dry the flap and the opening
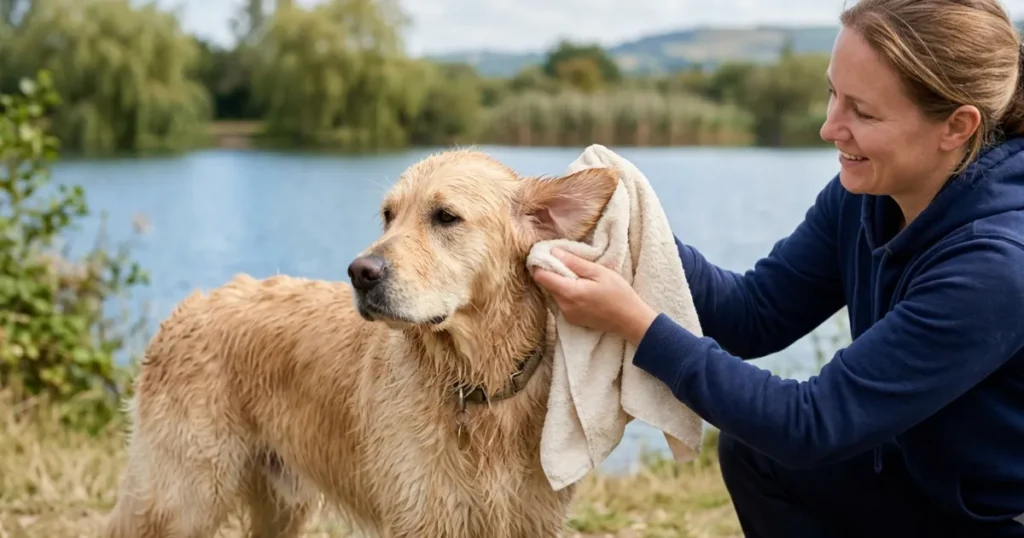
Take a soft, dry towel or a cotton ball and gently dry the ear flap and the part of the canal you can see. Wipe, do not dig.
Never push a towel corner, cotton ball, or anything else deep into the canal. You want to absorb the moisture you can reach, not force water inward.
Step 3: Use a drying solution for frequent swimmers
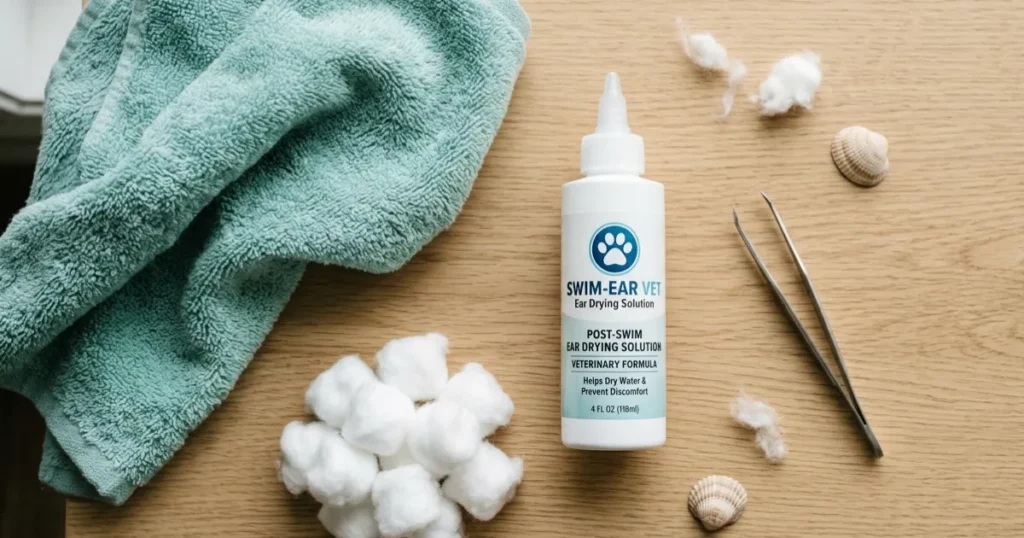
If your dog swims often, a vet-approved ear drying solution is the single most useful tool you can add. These are designed to evaporate excess moisture and balance the ear’s pH, which discourages bacteria and yeast.
Your vet may recommend a drying ear cleaner for a dog prone to infections. Apply it as directed, usually after the swim, then let your dog shake and wipe the opening.
There is a difference between a cleaning solution and a drying solution, and it is worth knowing. A cleaner lifts wax and debris, while a drying agent pulls moisture out and shifts the ear’s pH away from what yeast likes. Some products do both. For a heavy swimmer, the drying action is the part that prevents swimmer’s ear, so ask your vet for one that includes it.
Step 4: Check over the next two days
Drying is not the end. Over the following day or two, watch for redness, odor, head shaking, or scratching. Catching a problem early keeps it small. Reading those early signs is covered in what different wax colors mean.
The post-swim ear drying kit
You do not need much. Here is everything useful and what each item does.
| Tool | What it does |
| Soft towel | Dries the flap and outer canal |
| Cotton balls | Absorb moisture from the visible canal |
| Vet-approved drying solution | Evaporates deep moisture, balances pH |
| Cool hairdryer, lowest setting | Optional, dries the outer ear gently from a distance |
| Treats | Keeps a wet, wriggly dog cooperative |
Two cautions on this kit. If you use a hairdryer, keep it on the coolest, lowest setting and hold it well back, since heat and force both harm the ear. And skip cotton swabs entirely, since they push water and wax deeper rather than removing them. The safe cleaning method that pairs with this kit is in the correct ear cleaning routine.
How to prevent dog ear infections in a water-loving dog
Drying after each swim is the core habit, but a few extra steps stack the odds in your favor. This is how to prevent dog ear infections over a whole swimming season.
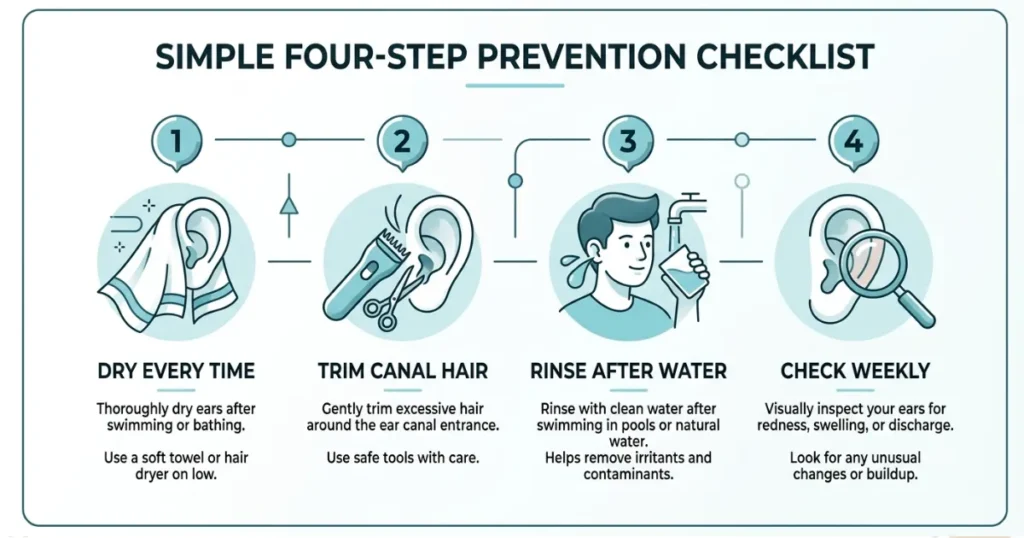
Dry every single time
Consistency beats intensity. Drying the ears after every swim and every bath matters more than any product. Even one skipped session can be the one that starts an infection.
Keep the canal hair managed
Hair inside the canal traps moisture and blocks airflow. Keeping it trimmed helps the ear dry faster, though the plucking question is more nuanced than it sounds, as the case for and against plucking ear hair explains.
Rinse after lakes and pools
Lake and river water carries debris and microbes, and pool chemicals can irritate the canal lining. A gentle rinse and dry after swimming removes both. The moisture, not the water source, is the main issue, so pool swimmers still need the routine.
Natural water is the bigger concern of the two. Lakes and rivers carry bacteria, algae, and organic debris that a filtered pool does not, and all of it can wash into the canal and sit there. If your dog swims in natural water often, be especially diligent with the drying routine, and watch the ears a little more closely in the days that follow.
Check weekly and know the signs
A weekly look and sniff catches trouble early. Watch for head shaking, scratching, odor, redness, and discharge. If your dog keeps getting infections despite good drying, the cause may run deeper than water, which is where why some ears never fully clear helps.
Put together, these habits turn dog ears after swimming from a reliable source of vet visits into a non-issue. None of them is difficult. The whole routine adds a minute to a swim, and it saves the discomfort, cost, and repeat trips that a full-blown ear infection brings. For a breed that will swim every day you let it, that minute is the best deal in ear care.
What not to do with wet dog ears
Some popular fixes do more harm than good. Avoid these.
| Mistake | Why it harms |
| Cotton swabs in the canal | Push water and wax toward the eardrum |
| Rubbing alcohol in the ear | Stings and dries the delicate lining |
| Hydrogen peroxide | Irritates the canal and leaves moisture behind |
| Hot hairdryer up close | Burns and dries the sensitive skin |
| Ignoring a wet ear | Lets moisture sit and infection start |
The theme is simple. Gentle, shallow, and dry is the goal. Anything that stings, burns, or reaches deep works against you. Be especially wary of internet home remedies, since many are useless or harmful, and the safe options are few, as set out in what home remedies are worth trying.
When a swim has already caused an infection
Sometimes an infection sets in despite your best efforts. Knowing the signs means you act fast.
Watch for persistent head shaking, scratching at the ear, a strong smell, redness, or discharge. These mean the drying routine has been overtaken by an active infection, and that needs a vet rather than more drying. What the vet does next is covered in the signs an ear is infected.
Do not try to clean or treat a painful ear at home. If your dog flinches when you touch the ear base, leave it alone and book a visit. Cleaning a painful, infected ear can push material against the eardrum and make things worse.
Quick Protocol
- Right after every swim: Let your dog shake, then dry the flap and the visible canal with a soft towel or cotton ball.
- For frequent swimmers: Follow with a vet-approved ear drying solution that evaporates moisture.
- Never: Push cotton swabs, alcohol, or peroxide into the canal.
- Then: Check the ear over the next day or two for redness, odor, or head shaking.
Expert Insight
Every summer my exam room fills with swimmer’s ear, and almost all of it is preventable. The owners who never see it are not doing anything clever. They just dry the ears after every single swim, without fail. That one habit prevents more infections in water dogs than any medication I can prescribe.
How do I care for my dog’s ears after swimming?
Care for dog ears after swimming by letting your dog shake, then drying the flap and visible canal with a towel or cotton ball. For frequent swimmers, add a vet-approved drying solution. Never push anything deep into the ear.
Do wet ears really need drying every time?
Yes. A dog’s ears trap water deep in the canal after a swim, where it fuels yeast and bacteria. Drying every single time, after both swims and baths, is the most effective way to prevent infection. One skipped session can be enough to start one.
How do I dry my dog’s ears after swimming?
Let your dog shake first, then gently dry the flap and the part of the canal you can see with a soft towel or cotton ball. Wipe, do not dig. For frequent swimmers, follow up with a vet-approved ear drying solution.
How can I prevent dog ear infections from swimming?
The main step in how to prevent dog ear infections is drying the ears after every swim. Add a vet-approved drying solution for frequent swimmers, keep canal hair trimmed for airflow, and check the ears weekly for early signs of trouble.
What is swimmer’s ear in dogs?
Swimmer’s ear is a form of outer ear infection, called otitis externa, caused by water trapped in the ear canal after swimming. The moisture lets yeast and bacteria grow. Dogs that swim often are at higher risk, especially floppy-eared breeds.
Can I use a hairdryer on my dog’s ears after swimming?
Yes, carefully. Use the coolest, lowest setting and hold the dryer well back from the ear. Heat and force both harm the delicate canal, so it should only gently dry the outer ear, never blast air into the canal.
Should I use a drying solution on my dog’s ears after every swim?
For frequent swimmers or dogs prone to infections, yes, if your vet recommends it. A vet-approved drying solution evaporates deep moisture and balances the ear’s pH. Occasional swimmers may only need a good towel dry and a shake.
Are Golden Retrievers more likely to get swimmer’s ear?
Yes. Golden Retrievers love water and have hanging ears and hairy canals that trap moisture, so they are among the breeds most prone to swimmer’s ear. Drying their ears after every swim matters more for this breed than most.
Can pool water cause ear infections in dogs?
Yes. The main issue is trapped moisture, not the water source, so pool swimmers need the same drying routine as lake swimmers. Pool chemicals can also irritate the canal lining, which adds a second reason to rinse and dry after a pool swim.
How soon after swimming should I dry my dog’s ears?
As soon as possible, ideally right after the swim while you are still together. The longer water sits in the warm canal, the more chance yeast and bacteria have to grow. Drying promptly is far more effective than drying an hour later.
What are the signs of an ear infection after swimming?
Watch for head shaking, ear scratching, a strong odor, redness, and discharge in the days after a swim. These signs mean an infection may have started and warrant a vet visit within a day or two rather than more home drying.
Can I put vinegar in my dog’s ears after swimming?
Some owners use diluted vinegar solutions, but this is debated and not right for every dog. Vinegar can sting a raw or inflamed ear. Ask your vet before using any home solution, and never use it on a painful or already infected ear.
Should I keep my dog out of the water to protect his ears?
Usually not. Swimming is great exercise, and most dogs love it. The goal is a reliable drying routine, not avoiding water. Only a dog with severe, recurring ear problems may need a break from swimming, on a vet’s advice.
The bottom line
Dog ears after swimming are a setup for infection, but the fix is quick and simple. Water trapped at the bend of the canal is what starts the trouble, so getting that moisture out is the whole game.
Let your dog shake; dry the flap and visible canal with a towel or cotton ball, and for frequent swimmers, add a vet-approved drying solution. Keep the canal hair trimmed, check the ears weekly, and never push anything deep into the ear.
Do this after every swim and every bath, without exception, and your water-loving dog can enjoy the water all season long. The single habit of drying the ears every time prevents more infections than any product or treatment ever will.
For a breed that lives for water, ear care after swimming is a year-round job, and every owner works out their own system.
We would like to hear yours. What is your routine for drying your Golden’s ears after a swim, and did you land on it before or after a bout of swimmer’s ear? If a particular drying solution, wipe, or trick made the real difference for your dog, please share it. Your routine might be exactly what another water-loving Golden needs.